(Warning: use the following tips and tools at your own risk. Always back up your original media, and never work directly on your only copy!)
AVCHD Media and Mountain Lion
Apple’s OS X 10.8 Mountain Lion has added a new feature for playing AVCHD media, and along with this feature, they automatically treat AVCHD folder structures as packages. They are still navigable in Finder via the “Show package contents” contextual menu, but this isn’t always ideal.
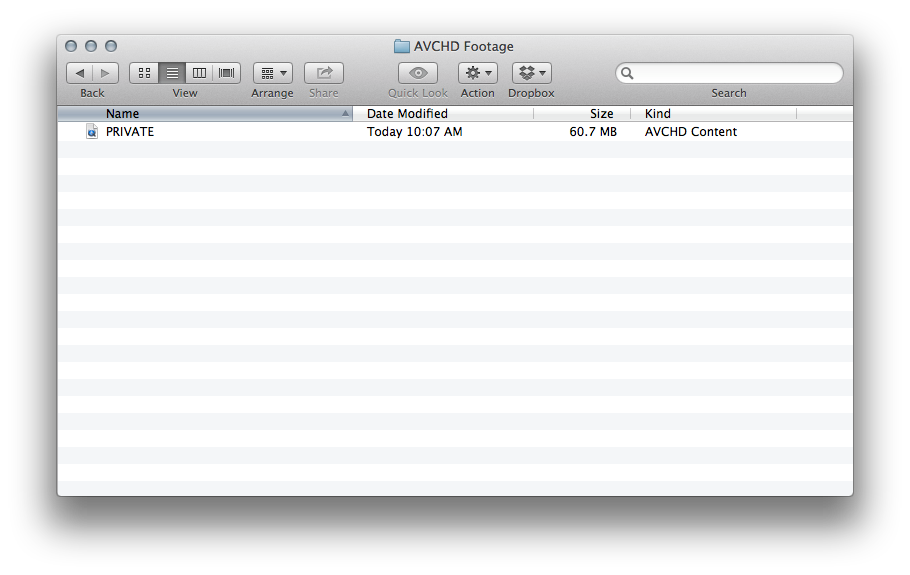
OS X 10.8 shows AVCHD folder structures as packages
When is a Folder Not a Folder?
One tip mentioned a few places online is renaming folders in the AVCHD structure so that OS X no longer recognizes it as a special item and presents it in Finder directly as a simple folder. One clever variation on this idea is renaming the folders such that they’re lowercase — renaming PRIVATE to private, AVCHD to avchd, BDMV to bdmv, etc. This keeps the names intact and shouldn’t spoil case-insensitive file paths, but since AVCHD is not supposed to be lowercase, OS X doesn’t treat it as AVCHD.
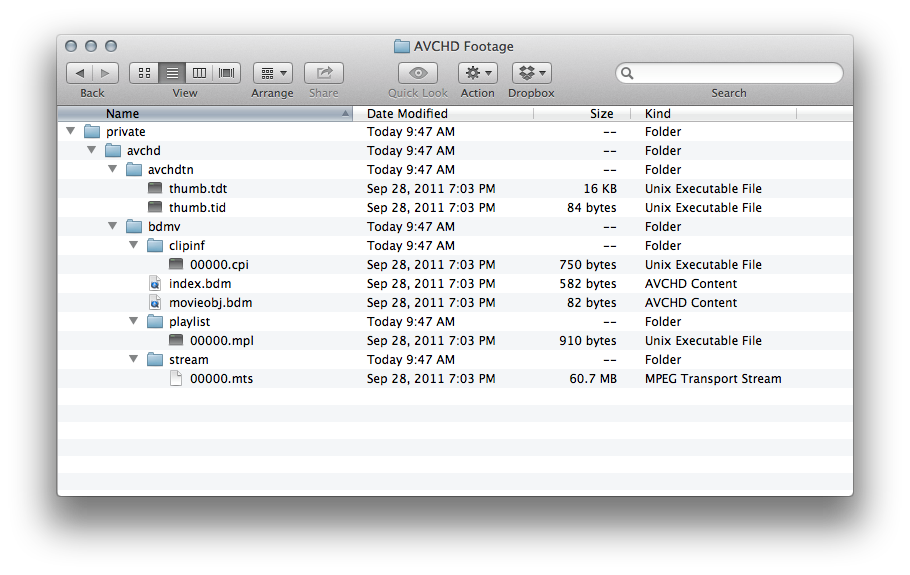
Renaming to lowercase preserves the names, but prevents OS X 10.8 from displaying the AVCHD folder structure as a package.
While the all-uppercase to all-lowercase renaming is theoretically reversible, please note that renaming folders does permanently change their modification dates.
Automation
Renaming these folders in the Finder is tedious, so I’ve written two Automator workflows. The first, called AVCHD Package to Folders traverses the folder structure and renames everything inside it to be all lowercase. The second, called AVCHD Folders to Package, traverses the folder structure and renames everything inside it to be all uppercase. These workflows can be installed as services, making them available in the Finder contextual menus via right-click, or they can be installed as applications, which accept drag and drop from the Finder.
Again, use these at your own risk, and please always duplicate your AVCHD originals (the entire folder structure) for safekeeping. Using these tools on files or folders other than AVCHD media is possible, and if you do, it will destroy any mixed-case naming in the folder structure you run it on. I haven’t broken anything here yet, but you might not be so lucky!
Of course, comments and feedback are most welcome.
You can download the Automator workflows here:
Download AVCHD Package Folder Services
Download AVCHD Package Folder Apps
Double-clicking the services items will allow you to install them as services (right-click in Finder), or allow you to open the workflows in Automator. Dragging and dropping folders onto the apps will run them; dragging and dropping the apps onto Automator should open the workflows for examination.
If you’d prefer to build them yourself, here are some screenshots from Automator that show exactly what these do.
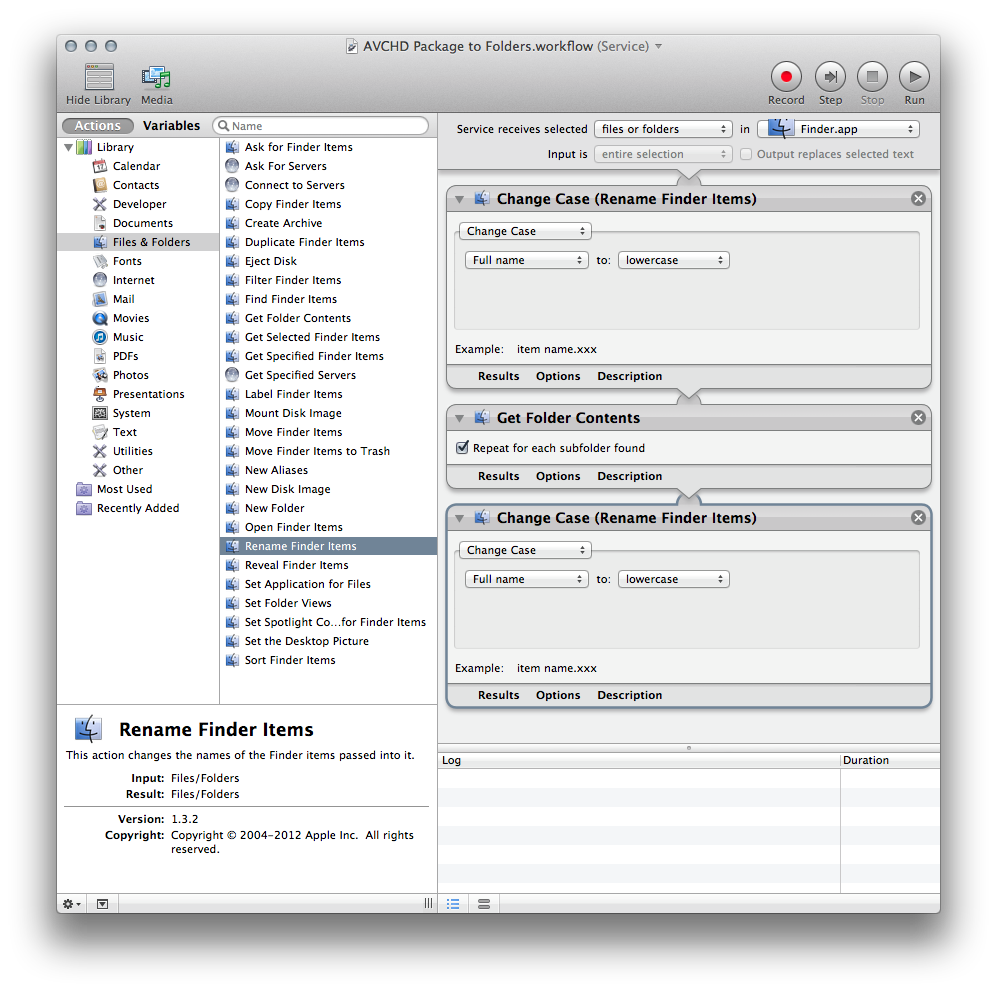
Screenshot of the AVCHD Package to Folders workflow

Screenshot of the AVCHD Folders to Package workflow


